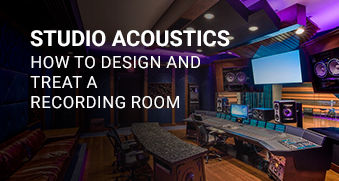
Studio Acoustics: How to Design and Treat a Recording Room
The best studios find a balance between acoustic perfection and real-world usability. Make sure your space is comfortable, inspiring, and practical for the kind of work you do. With thoughtful planning and smart treatment, you’ll create a recording room that sounds great and feels great to work in.


Creating a space where every note, word, and nuance is captured perfectly starts with smart recording room design. Whether you’re setting up a professional studio or a home setup, understanding studio acoustics and sound recording studio design will make all the difference. Let’s walk through everything you need to know about how to treat a room for recording—from basic principles to practical tips.
Understanding Acoustic Principles
Before you start moving furniture or ordering gear, it helps to know how sound behaves in a room.
How Sound Travels and Interacts with Spaces
Sound waves move through the air, bouncing off surfaces like walls, floors, and ceilings. Depending on the materials they hit, these waves can be reflected, absorbed, or diffused. Hard surfaces (like drywall or glass) reflect sound, which can cause echoes and reverb. Soft, porous materials (like foam or carpet) absorb sound, making the room quieter and clearer.
Common Acoustic Problems in Untreated Spaces
Without proper treatment, your recording room might suffer from issues like echo, flutter (repetitive echoes), standing waves (bass buildup), and uneven frequency response. These problems can muddy your recordings and make it tough to mix accurately.
Sound Isolation Strategies
Isolation is key for keeping unwanted noise out—and your sound in.
The Room-within-a-Room Concept
One of the most effective ways to isolate your studio is by building a “room within a roomâ€â€”a separate structure inside your main space. This approach uses air gaps and floating floors to prevent sound from traveling through walls and floors. It’s the gold standard for professional studios but can be adapted for home setups too.
Materials and Construction Techniques
Use dense materials like drywall, mineral wool, or specialized soundproofing panels to block sound. Double stud walls, resilient channels, and sealing gaps around doors and windows also help keep noise from leaking in or out.
Dealing with HVAC and Electrical Considerations
Heating, ventilation, and air conditioning (HVAC) systems can introduce unwanted noise. Choose quiet equipment, mount it carefully, and use insulated ducts to minimize sound transmission. Plan your electrical layout for easy access to power and data, while keeping cables organized and out of the way.
Acoustic Treatment Principles
Once your room is isolated, it’s time to treat the acoustics inside.
Absorption vs. Diffusion
Absorbers (like foam panels or fiberglass) trap sound energy, reducing echoes and reverb. Diffusers scatter sound waves, creating a more natural and balanced acoustic environment. A mix of both is usually best for most studios.
Bass Trapping Fundamentals
Bass frequencies tend to build up in corners, so placing bass traps there helps control low-end muddiness and makes your mixes clearer. Floor-to-ceiling traps in corners are especially effective.
Strategic Placement of Acoustic Treatments
Start by treating “first reflection pointsâ€â€”the spots on walls, ceilings, and floors where sound from your speakers first bounces off. Then add treatment to larger flat surfaces and corners as needed.
Studio Layout and Workflow Design
A well-planned layout makes recording and mixing easier and more enjoyable.
Control Room Considerations
Your control room should be comfortable, with monitors placed for accurate listening and gear within easy reach. Aim for symmetry and good sightlines to the recording space. Cable management and ergonomic seating help keep sessions running smoothly.
Workflow Efficiency and Ergonomics
Think about how you and your collaborators will move through the space. Keep frequently used gear accessible, plan for comfortable seating, and make sure there’s enough room for everyone to work without bumping into each other. Good lighting and climate control also help keep everyone focused.
Technical Equipment Considerations
The right gear and setup can make or break your studio.
Monitoring Environment Setup
Place your studio monitors at ear level, forming an equilateral triangle with your listening position. This setup gives you the most accurate sound for mixing and mastering.
Signal Flow Planning
Plan your signal chain from the microphone (or instrument) through preamps, processors, and into your recording device. Understanding signal flow helps you troubleshoot issues and keep sessions stress-free.
Budget Considerations and Phased Implementation
You don’t have to do everything at once—start with the essentials and build from there.
Prioritizing Essential Elements
Focus on the most important treatments first: bass traps, first reflection points, and basic sound isolation. You can add more advanced treatments as your budget allows.
DIY vs. Professional Solutions
DIY acoustic panels and bass traps are a great way to save money, but complex projects might benefit from professional help. Consider your skills, time, and goals when deciding which route to take.
Long-term Studio Evolution
Your studio will grow and change over time. Plan for flexibility—choose modular treatments, leave room for new gear, and be ready to adapt as your needs evolve.
Balancing Practicality with Acoustics
The best studios find a balance between acoustic perfection and real-world usability. Make sure your space is comfortable, inspiring, and practical for the kind of work you do. With thoughtful planning and smart treatment, you’ll create a recording room that sounds great and feels great to work in.


CATEGORIES
- MBA Program
- Data Science and Analytics
- Cloud Computing
- Data Analytics and Business Intelligence
- AI and Digital Systems
- Cyber Security and Digital Forensics
- Business Analytics & Intelligence
- Banking & Financial Services
- International Business
- Digital Marketing
- Research Paper
- Media & Entertainment
- Media Management
- Journalism and Media Production
- Media & Information Technology
- Visual Communication
- Game Development
- Sound Engineering
- Game Art & Design
- Photography
- Film Making
- Animation & VFX
Are you aspiring to become a proficient Sound Engineering professional?
Look no further; we are committed to nurturing the potential of young minds. Are you ready to enhance your skills?


