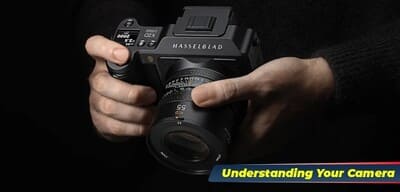
Understanding Your Camera
Whether you have a DSLR, mirrorless model, or one of the advanced point-and-shoot cameras, your investment in cameras will not be fruitful unless you get off “auto mode” and explore the flexibility and freedom of creative control you get with the manual mode. This article aims to help you understand how digital cameras work and equip you with the essential skills to capture a picture-perfect moment.


How Do Cameras Work?
A camera is a complex technology created to capture moments and make a picture. The main principle behind a photograph is light, and the camera lens helps modern-day cameras take sharp images in a split second.
How does the camera lens work? Although light bounces off objects, it can also pass through them. The camera lens takes the rays of light that bounce around and redirects them into a single point to create a sharp image. This point is usually a camera sensor; when the light reaches it, you will get a sharp image; however, if all the light does not reach the correct point, the picture may look blurry and out of focus.
There are 2 basic types of camera lenses, i.e., prime and zoom lenses, within which you can find more types based on the focal length. These are:
- Macro lenses
- Telephoto lenses
- Wide angle lenses
- Standard lenses
- Speciality lenses: Fish eye, infrared, and tilt-shift
Once you have got yourself the camera of your dreams, it is vital to understand the different aspects of taking the perfect shot.
Exposure
When you are in auto mode, the camera usually chooses this setting for you, but when you set it yourself, you can turn your vision into a photograph. To do this, you must understand and adjust the camera exposure settings based on how light or dark you want your picture to be. Motion blur, depth of field, resolution, and other factors you usually take for granted are controlled by the exposure settings.
What is the exposure triangle on a camera?
Aperture, shutter speed, and ISO are all essential components of the exposure triangle to help you get your picture just right. A very good example is, if you want to collect a certain amount of rainwater in a bucket in a set amount of time, you would need to get the right length, width, and height bucket so that you do not run out of time and not collect enough water (underexpose) or collect too much water (overexpose). In this case, the rain is light, and the bucket’s length, width, and height are the camera exposure settings of aperture, shutter speed, and ISO speed.
Aperture
For those who are wondering what the use of aperture in a camera is, it is basically the setting that controls the size of the opening that lets light into the camera. A larger window allows more light to enter the lens, creating a brighter photograph, while a narrower aperture will let in less light. Not only does the aperture setting affect the photograph’s exposure, but it also controls the sharpness of the image and plays a role in depth of field. Camera aperture is most often a game of balance. A wide aperture can help you blur the background to draw attention to the subject.
Shutter Speed
The camera shutter speed is the opening and closing speed of the camera’s shutter to let the light in. Once you learn how to use the shutter speed on the camera, you can also control the brightness and the amount of motion blur in the picture. A longer shutter speed in an open camera results in more light creating a brighter image, while a shorter shutter speed gives darker exposure and reduces the amount of motion blur. Camera shutter speed is usually referred to in fractions of a second. Fast shutter speeds can freeze motion in a picture; if you have to photograph something moving very fast, it is best to prioritise shutter speed. If you are more interested in still photography, you can choose a lower shutter speed; the same is true for darker environments when you need more light to come through for a brighter photograph.
ISO
The final part of the exposure triangle, the ISO feature in a camera, helps determine exactly how sensitive the camera’s sensor is to light. A low ISO maintains the quality of your image so that it isn’t sensitive to light; on the other hand, if you set the camera on a high ISO setting, it makes the sensor a lot more sensitive to light but can also cause the picture to have more noise. The function of ISO in a camera is to help balance out the aperture and shutter speed. You can bump up the ISO setting for higher sensitivity if you want a sharp image but with a narrow aperture.
While exposure is the play on light and sensitivity to capture the perfect image, you must also pay attention to the white balance setting that helps the camera adjust to different light colours. The auto white balance feature works exceptionally well on most cameras, so you do not have to worry about the picture showing more of one colour. Focus is another aspect of your camera you need to play around with to get the best results.
Most of the information on changing each of these settings can be found in your camera’s user manual, as it will differ based on the kind of camera you choose. If you want to take up photography as a career or if you want to take your hobby to the next level, you can opt for one of our advanced photography courses that start from scratch and teach students how to capture the perfect picture.


CATEGORIES
Are you aspiring to become a proficient Photography professional?
Look no further; we are committed to nurturing the potential of young minds. Are you ready to enhance your skills?


